Namaste y’all! In todays Siri dictated blog post, I will show you how you can configure access control lists (ACL) for a directory using Intune Proactive remediations. The issue I was facing was that regular users do not have modify permissions to the public desktop on their corporate devices, meaning that the user is unable to remove annoying shortcuts that would get placed there by the various apps they install. While this is hardly a high priority task to solve.
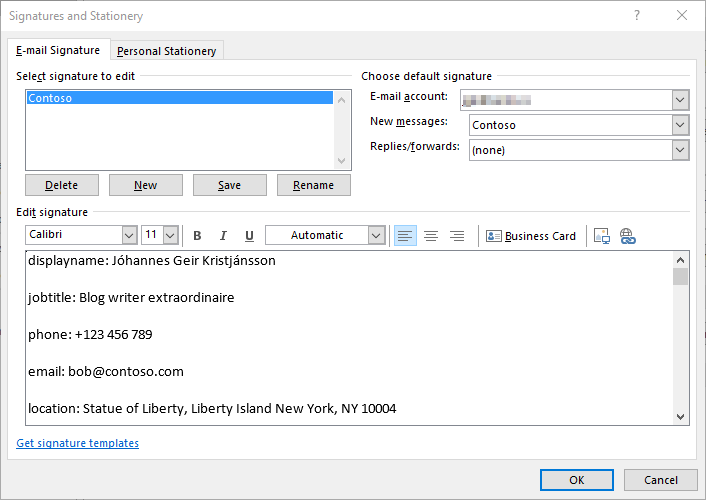
Howdy y’all! Since you have already read señor Shackelfords blog post on setting up Endpoint Analytics Proactive remediations, we can skip the intro and dive right in. In this blog post we will be get familiar with a somewhat novel idea that proactive remediation’s can be used for. Which, as the title of this post suggests, is the creation of a dynamic email signature in the form of a .html file using Microsoft Graph.
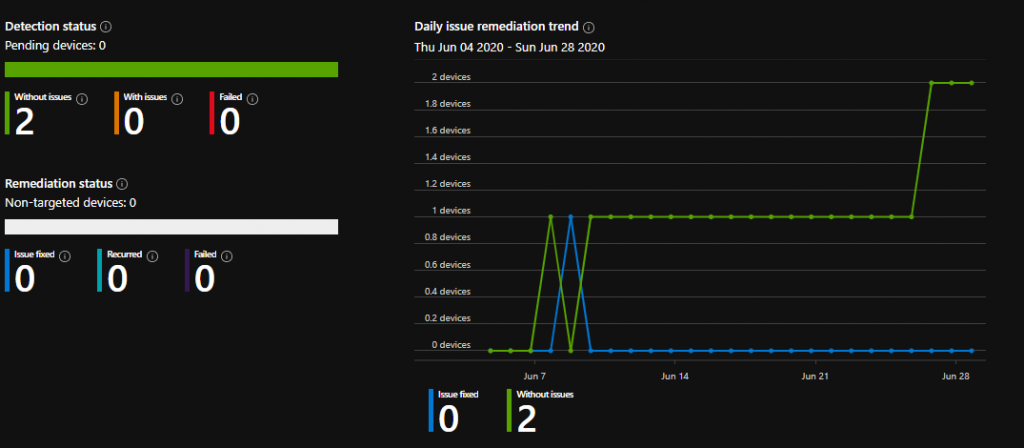
What is Proactive Remediation? Proactive remediations are a pair of scripts used to detect and remediate a problem on a machine. The first script runs a query on your endpoints that returns an exit code of success or failure. We call this first script the detection script. On a successful exit code it is reported as “Without issue” in the Intune portal and nothing else is executed. On a failed exit code the second script is run which is called a remediation script.
2021-04-27 update: The solution now works over CMG. Please see this post for details. If you haven’t seen my first blog post about modern driver management, the quick summary is that the solution uses packages created with the Driver Automation Tool and the administration service to retrieve information on these packages and identify the most suitable driver package to apply in a task sequence. In this second part, I’ll be discussing the changes and improvements done to the existing solution to also dynamically retrieve and filter and apply BIOS updates.
Recently I had case where a we had to deploy computers that required Kiosk mode. Trouble was, I couldn’t run Windows Kiosk mode for the auto start of the application I wanted the Kiosk users to operate. I discovered these registry settings to allow me to functionally create a Kiosk environment. These registry edits will result in the following: Any time the user logs into this computer. The chosen application will launch.
In this post I’ll show you how to start building a ConfigMgr lab, for either Current Branch or Technical Preview, using AutomatedLab with Hyper-V. This approach is intended to be completely automated and “hands off” by calling a single script. It downloads all the necessary files for you, including the CB or TP installation media. All you have to do is provide a Windows Server 2016/2019 ISO, but this can also be an evaluation copy.
What is AutomatedLab? AutomatedLab is simply PowerShell module. In some ways it’s a framework because it encourages a particular workflow for managing named labs consisting of VMs with prefined applications / “roles” or custom roles. The benefit using AutomatedLab is the simplicity it offers to quickly fire up and throw away environments, and rebuild again. It also offers a huge range of functions to build out whatever you want. Generally, the workflow goes something like:
For my customer the move to remote work is here to stay. In adjustment to the “New Normal,” deployment projects put on hold these last months are in discussion again. One project resuming soon is the upgrade from Office 2016 to Microsoft 365 Apps. With many laptop computers now internet or VPN-based what can be done to optimize upgrades for these remote users? To provide background, my customer has recently implemented cloud management gateways and cloud distribution points.
This post complements my other post, where I walk-through the differences of LP, LIP, LXP and FoD. Here I will show you how to use a PowerShell module I wrote, PSCMWin10Languages, to create Microsoft Endpoint Manager Configuration Manager Applications for each language you want to deploy via the Software Center. These Applications are not for OSD. It changes the language only for the user who installs the Application via the Software Center.
For a while I have been curious on how to do Windows OSD with multiple languages “the proper way” using Configuration Manager. Whenever I have approached the subject I have always felt overwhelmed. Googling the topic is just a hot mess. You’re faced with information that’s old, lacking real detail or generally misunderstood. My aim here is to demystify the topic and show you a solid way to do Windows 10 multi language OSD with ConfigMgr along with sound reasoning.


