THIS GUIDE IS NOW OUTDATED WITH THE RELEASE OF WVD 2.0, I will create a new blog with the updated info in the future! Some of the info below is still valid!
Why Windows Virtual Desktop?
Windows Virtual Desktop allows you to create virtual Windows 10 machines that can be accessed from virtually anywhere. This means you can give someone a full desktop experience from virtually anywhere including android and iOS! In addition, if you do not want users to have a full desktop you can deploy specific applications which look and act like a native app on the machine, which can save you time and headaches when trying to deploy complex software.
Requirements
| OS | Required license |
|---|---|
| Windows 10 Enterprise multi-session or Windows 10 Enterprise | Microsoft 365 E3, E5, A3, A5, F1, Business |
| Windows E3, E5, A3, A5 |
This guide assumes you have either Azure Active Directory Domain Services (Azure AD DS) or a network connection from your Azure tenant to your on-premises network. In the following guide I will be going over the Azure AD DS method, but both are similar.
You will also need Marcel Meurer’s tool (I provide download links farther down). Several of the items I will be covering are a re-hash of what he has in his post but with more steps for using the tool and creating a master virtual machine (VM).
Creating Resource Groups
- Login to the Azure portal https://portal.azure.com/
- Click the Create a resource button
- Search for Resource group
- Create a Resource group called DOMAIN-Master-VMs or whatever you’d like your golden images to be based off (YES WVD is essentially build and capture/reference image)
- Create a second Resource group and give it whatever name you’d like. EX. I’m going to deploy AutoCAD so I’ll name it DOMAIN-AutoCAD-HostPool
Creating a Service Principal Account
We need to create a service principal account to access Marcel’s UI and also grant permission to different resource groups in order to manage our WVD environment
- From the Azure Portal Dashboard, navigate to Azure Active Directory
- Select App registrations
- New Registration
- Give your application a name; I chose “svc_WVDAdmin
- Leave the rest default
- Select Register
- Go to your newly created application
- Record the Application client ID and Directory tenant ID for later
- Select Certificates & Secrets
- Create a new client secret
- Select an expire date; I chose Never
- Select Add and record the key value you are given as you can’t ever see it again
- While we are in AAD navigate to the overview page and record the Tenant Name which should be above the Tenant ID
Granting Access for our Service account
- Navigate to the two Resource groups we created earlier
- Select Access Control (IAM)
- Select Role assignments
- Select Add
- Select Role assignment
- Role should be set to Contributor
- Select should be set to your Service account; in this case svc_WVDAdmin
- Select Save
- Apply the same setup to your other resource group or any resource groups you want to create and manage WVD with
Creating a WVD tenant
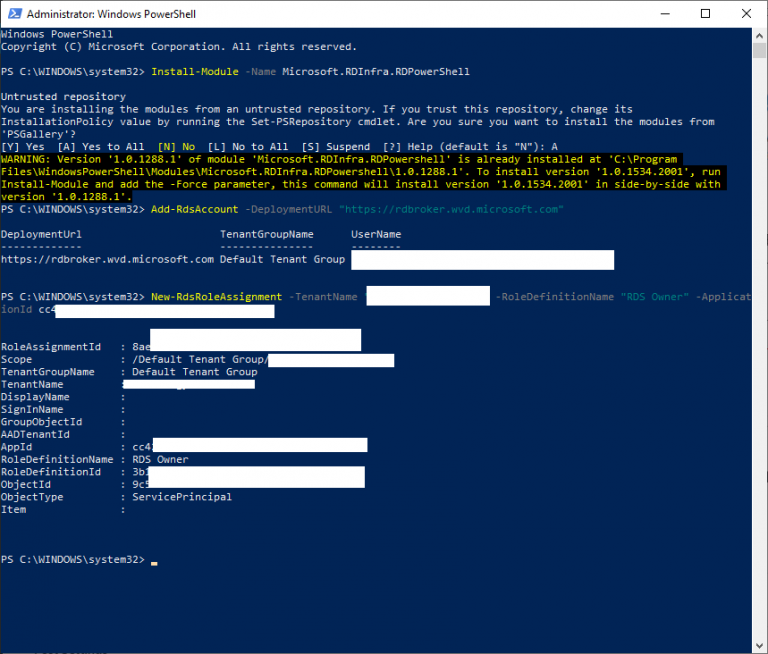
Time for some powershell! The following powershell will add a WVD tenant. Please use an administrative account when signing in as you have to grant access for your tenant.
| |
Setting up Marcel’s tool and creating a network share
Earlier I mentioned I will be going over the method with Azure AD DS. I currently have a tools server in Azure that I’m using to manage everything so I will be signing into that. This gives me access to view and manage Azure AD DS and install any other tools I might need such as WVD. One thing I don’t cover in this guide is Network Security Groups. I would strongly suggest blocking all RDP access except from Specific IPs so that only you can access the MasterVMs and your tools server.
You will need to download 4 items at this point:
- Marcel’s tool
- ITPC-WVD-Image-Processing.ps1
- Microsoft.RDInfra.RDAgent.msi
- Microsoft.RDInfra.RDAgentBootLoader.msi
- Rename 2-4 to match the link text since they will be named incorrectly when you download them.
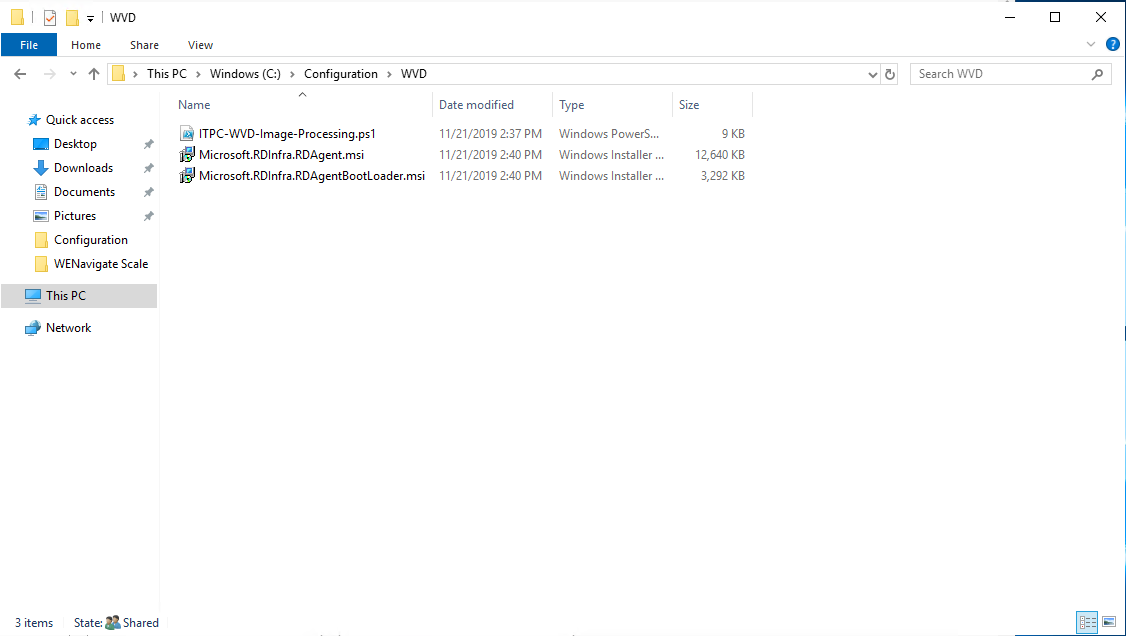
With these downloaded, create the file share:
- Navigate to C:\ and create a folder called Configuration
- Inside of your Configuration folder create a WVD folder
- Right click the WVD folder and select Share
- Give Everyone Read Access
- Move the 3 files we downloaded and renamed earlier into this folder; it should look like the following
- Next install Marcel’s tool. You can leave all the options to default
Launching the tool
We are ready to at the very least get signed into the tool now!
- Launch the WVD Admin tool that we just installed
- Input the Azure Tenant ID, Service Principal ID and the Principal Key you recorded earlier
- Select Save
- On the left-hand side select Reload All
You should see two forests, one being your Tenant Name the other being Azure. If you expand your tenant name you will see the resource group for the host-pool we created earlier assuming the permissions were assigned properly. If you expand the Azure forest you will see Virtual Machines and Images. At this stage you shouldn’t have much else since we haven’t created any master VMs for our host pools.
Creating Master VMs
I hate to use the word master VMs as it really boils down to a golden image or the old build and capture mentality but that’s currently what we have to work with in WVD.
- Navigate to the Master-VMs resource group we created earlier
- Create a new resource by selecting the Add button
- Search for Microsoft Windows 10 + Office 365 ProPlus (you do the + Office 365 ProPlus because the non-office version isn’t the latest release of windows) and make sure you’re selecting the latest version
- Click Create

- For Virtual Machine name change it to whatever your preference in my case i’ll be calling it AutoCAD after the program that I’ll be installing
- You can leave the Size default I typically select B2Ms as I like to penny pinch (Please note this server won’t cost you anything other than the storage of the drive when we are done with it)
- Scroll down and set an administrator account. This is a local admin account
- Select Next: Disks
- I change my disks to Standard HDD again to save on costs.
- Select Next: Networking
- Select the Virtual Network that your Azure AD DS exists on
- Change the subnet as needed
- Select Next: Management
- Turn off Boot Diagnostics
- Select Review and Create
- Select Create
- It will take a few minutes for the VM to deploy
- Once it has deployed, connect to the VM via RDP
- Install your applications (You can have as many applications as you want. In fact it’s easier to manage if you put them all on one VM but this is up to your discretion)
- Make a note of the full path to the .exe of the programs you want to give access to
- Install Windows Updates
- Restart and check for more Updates
- Once updates are done Disable the Windows Update Service
- Domain join the machine
- Make any registry changes you want. I personally use the list below
- Shutdown the VM
| |
Creating a Template Image
Now that we have a VM that’s ready to go let’s create a template of it! Using this method, the tool creates a temporary VM and creates an image based off that temporary VM. Once it’s done the temporary VM is deleted and you’re left with your original VM and a template image. This is great because if we want to go back and apply updates to the applications or windows itself we can boot up the original VM apply our changes and make a new template image from it.
- Open WVD Admin tool
- Select Reload all
- Expand the Azure tab
- Expand your Virtual machines
- Expand your Resource groups
- Right click on the VM we want to create a template of
- Select Create a template image
- On the left-hand side you’ll want to give the Image a name or keep what’s defaulted
- Make sure the Template VM is the one you selected
- Target RG should be the resource group where you want this template to live in my case I keep them in my MasterVMS resource group
- Script path is going to be the full path name where we have the 3 configuration files we added to our share earlier (EX: \Server.Contoso.com\Confiration\WVD
- Select Capture
- This process takes on average about 10 minutes
Creating a host pool

Now that we have a template image, we are ready to create the host pool!
- Navigate to your Tenant name on the left-hand side
- Right click on your tenant
- You will have 2 options one being Shared the other being Persistent/VDI in this scenario we are going to select Shared
- Select a name for the resource. In my case I’ll call it AutoCAD
- Navigate back to Azure and expand Images
- Expand your Resource Groups
- Right click the image that we created earlier
- Select Create a session host from image
- Your screen at this point should look like this:
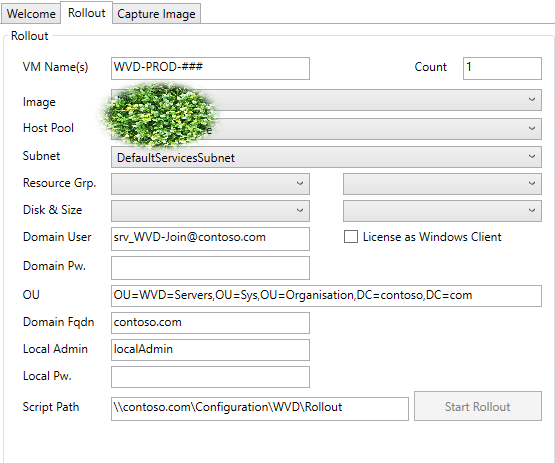
- First we can apply a VM Name. You’ll notice at the end we have ###, this will auto number the VM based on the Count to the right so if I have a count of two it will create two VMs in the host pool called WVD-PROD-001 and WVD-PROD-002
- We will select our Image
- Select the host pool we created at the beginning of these steps
- Select your subnet
- Select the resource group you’d like these servers to live in (EX I’ll be using the resource group we created earlier DOMAIN-AutoCAD-HostPool )
- Select your Disk and Size in my case I use PremiumLRS or UltraSSDLRS
- For Size I usually go with Standard B4ms however this will vary on the app and will take some testing to properly size
- Domain User and Password should be pretty straight forward, in this case since we are using Azure AD DS we use the full email address and password of someone who’s allowed to domain join a machine
- You will want to check the License as Windows Client checkbox if you meet the licensing requirements listed earlier in this post as it will save you roughly 40% on VM costs ***
- OU should be set to the OU you’d like the machine joined too; in this case I will be selecting the Azure AD DC Computers OU located on my Azure AD DS
- Domain FQDN should be straight forward simply put your domain name (EX contoso.com)
- Local admin and password will be the local administrator account on the newly created VMs
- Script path should be set to the same path as when we created an image template (EX: \Server.Contoso.com\Confiration\WVD)
- Select Start Rollout
- The time for this can vary based on machine size and number of machines
- Once completed, you will be able to go to the resource you created under your tenant and see the Session Hosts
*** Note that if you are using forced tunneling in your environment that your activation will fail. See the following links for more details:
Assigning Groups and Access
Now that we have a host-pool we can start assigning access to them. On the resource we created earlier under our tenant in the WVD Admin application you should be able to see the session hosts that we just made. You’ll also notice that a tab called Host Pool opens up.
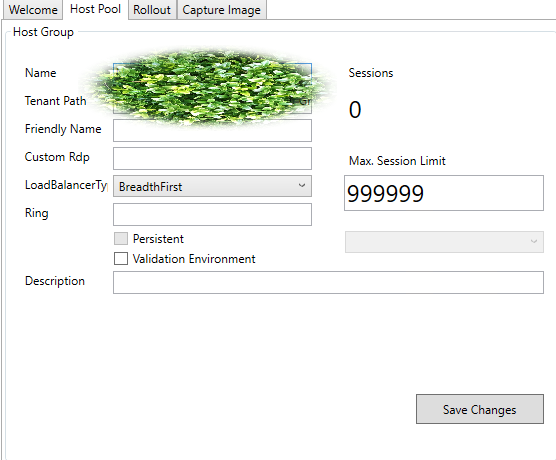
From here we can change several things; the two important ones being the Max Session Limit and Load Balancer Type. Max Session limit should be pretty straight forward, how many sessions can each VM in the Session host accept. Load Balancer Type gives you three options:
- Breadth First - Users will be evenly spread out across all the VMs in the host pool
- Depth First - Users will be loaded up onto the first VM until the max session limit is reached and then loaded onto the next
- Persistent - When a user signs in for the first time they will always logon to the same VM in the pool
In my experience Breath First is the one to go with as it will cause the least amount of hiccups performance wise, it’s also selected by default.
Now that we have that set, we have two options on the type of groups we can create:
- Application Groups - This grants access to a specific app and not the entire environment, if you are using the Remote Desktop application these apps will appear as if they are native apps on the machine
- Desktop Group - This will grant users to a full windows environment with all apps installed on the machine
In this scenario we will create an application group as a Desktop group is very straight forward
- Select the resource that contains your session Hosts
- Right click and select Add Application Group
- Give the group a name (EX AutoCAD)
- Right click the newly created group and select Add Remote Application
- Give it a name as well (EX Revit):
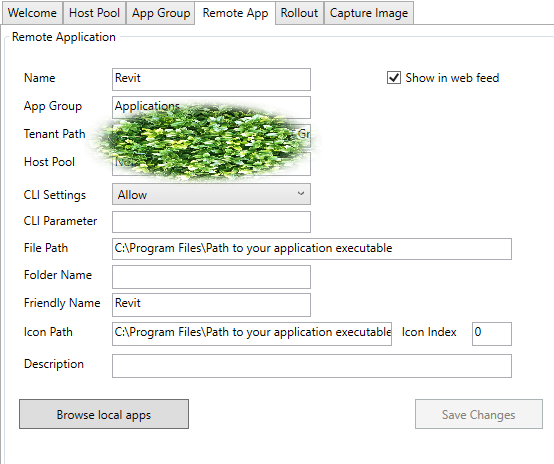
- I personally set CLI settings to DoNotAllow because I’m not passing any Azure CLI commands to these VMs (More info can be found HERE)
- File Path will be the path to the EXE that you should have copied down earlier when installing your applications, you can also set Icon Path to this as well
- If you want the app to appear in a folder you can give it a folder name, but I personally do not
- Friendly name is the name the app will appear as in the web feed or remote desktop application
- Select Save Changes
We are almost there! Take a minute to breathe or grab a drink!

Next, we are going to assign access to the application group we made. Currently in WVD we have to do manual assignments… it does not support groups but will in the future.
- Go to the application group we created (EX AutoCAD)
- You will notice under the App Group tab there is a blank box on the right-hand side
- Right click in that box and select Add
- Type in the users who need access to these apps (EX [email protected]; [email protected])
- Select Ok
- Right clicking and selecting refresh will show you the users who currently have access
You did it you’re done! Aside from having to test said applications!
To access these apps you can use one of the following:
Remote Desktop Client Remote Desktop Web client
I strongly recommend using the Remote Desktop Client option as the second just loads the app in a webpage. Once downloaded and installed you can subscribe with the user you granted access to and you should see the applications that were granted. If you double click on the app you will be prompted to sign in (Currently SSO only works with ADFS this will change in the future). The first sign in will be a little slower as it’s creating a profile for the user in the background. This can be alleviated with solutions such as FSLogix which is very easy to setup. In any event we are done and you’re now the proud owner of a WVD environment.
Jake Shackelford Admin/Contributor
Jake is one of our Admins but also our inaugural author and the main reason SysManSquad exists today.