Months after we issued students and faculty 600+ unmanaged off the shelf laptops (no AD, no Azure AD, no Intune, no ConfigMgr) to get them off and running temporarily during this pandemic, my co-worker and I were tasked with figuring out how to bring these machines under some form of management. We did not have these machines in ConfigMgr or have the hardware hashes uploaded into Intune, so we had some work ahead of us. Ultimately, we decided to re-image the devices using a ConfigMgr task sequence which also enrolls them into Autopilot. This allows us to remotely manage the device and wipe it after being used by a student.
I created a ConfigMgr PXE task sequence that with minimal intervention, will “reimage” the device to whatever version of Win 10 you choose (we use 1909 for now). It copies the AutopilotConfigurationFile.JSON and then resets the machine, ultimately bringing you to a login screen where any user with permissions can provision the device. The device will then bring down any policies and convert to Autopilot and you are off and running with an Intune managed device. Let’s walk through the steps!
Disclaimer: This blog assumes you have a working knowledge of ConfigMgr and Endpoint Manager Admin Center (MEMAC), and have administrative rights to your Intune Tenant.
First off we will prepare the Autopilot Profile and download the config JSON
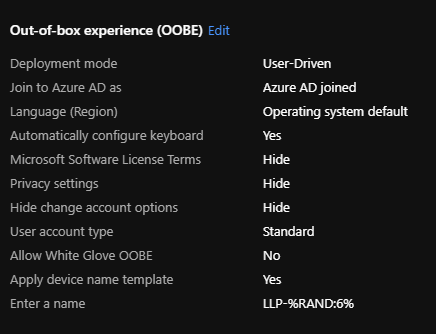
In MEMAC, navigate to the “Windows Autopilot deployment profiles” blade, and create a new Autopilot profile, call this whatever you want. The only basic setting we are worried about is the “Convert all targeted devices to Autopilot”, set this to Yes. Next we will set the OOBE settings to the following (Note: the “Enter a name” option can be whatever you want to name your devices, this is important as we will use this to target the Autopilot profile post image):
For now we will not assign this to a group, this comes later.
Next we are going to pull down this config into a file called AutopilotConfigurationFile.JSON. In powershell run the following commands:
Sign into your tenant here and back in powershell run the following command:
| |
Save this file in a folder by itself on a share somewhere that ConfigMgr has access to.
Next we head into ConfigMgr and create a new package, this package can have any name, but make sure you check the box “This package contains source files” and point it to the folder that houses your config file. On the following page, select “Do not create a program”. Distribute this package to any DP’s you will use.
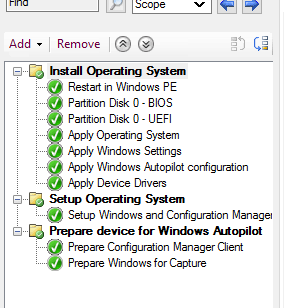
Now, create a new task sequence and select the option for “Deploy Windows Autopilot for Existing Devices”. The rest of these options can be default, just select your Windows image you want to use and on the Prepare System for Windows Autopilot screen, select the package that you just created that contains your JSON.
Once the TS is created it should look something like this:
We are going to make some small changes to this task sequence, when completed, it should look like this:
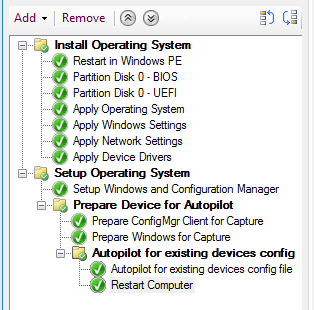
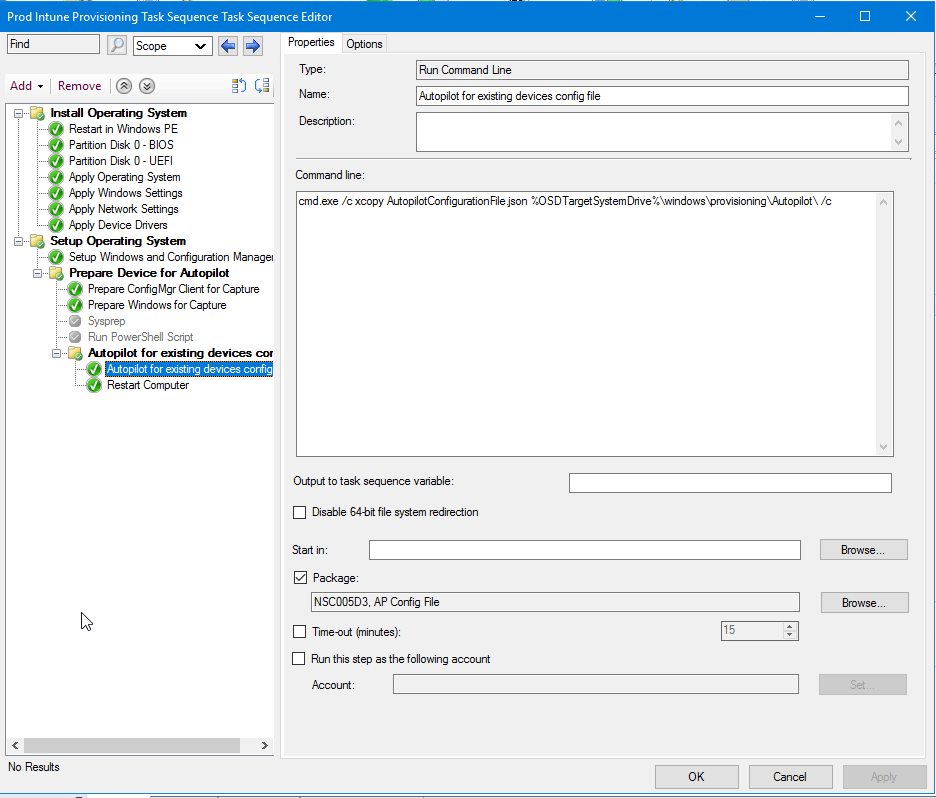
The step we added “Autopilot for existing devices config file” is a “Run Command Line” and will copy the config JSON from the package we created earlier and place it in the C:\Windows\Provisioning\Autopilot\ folder. It should look something like this:
| |
Distribute this content to your DP.
At this point lets head back to MEMAC and create our dynamic device security group that we will be targeting with our AP profile. The dynamic membership rules will be as follows (This is based on my computer naming convention that is in the Autopilot Profile)
| |
Once this group is created, navigate to the Deployment Profiles blade that we linked at the beginning of the blog, select your AP profile and under properties, edit the assignments and assign the profile to the newly created dynamic group.
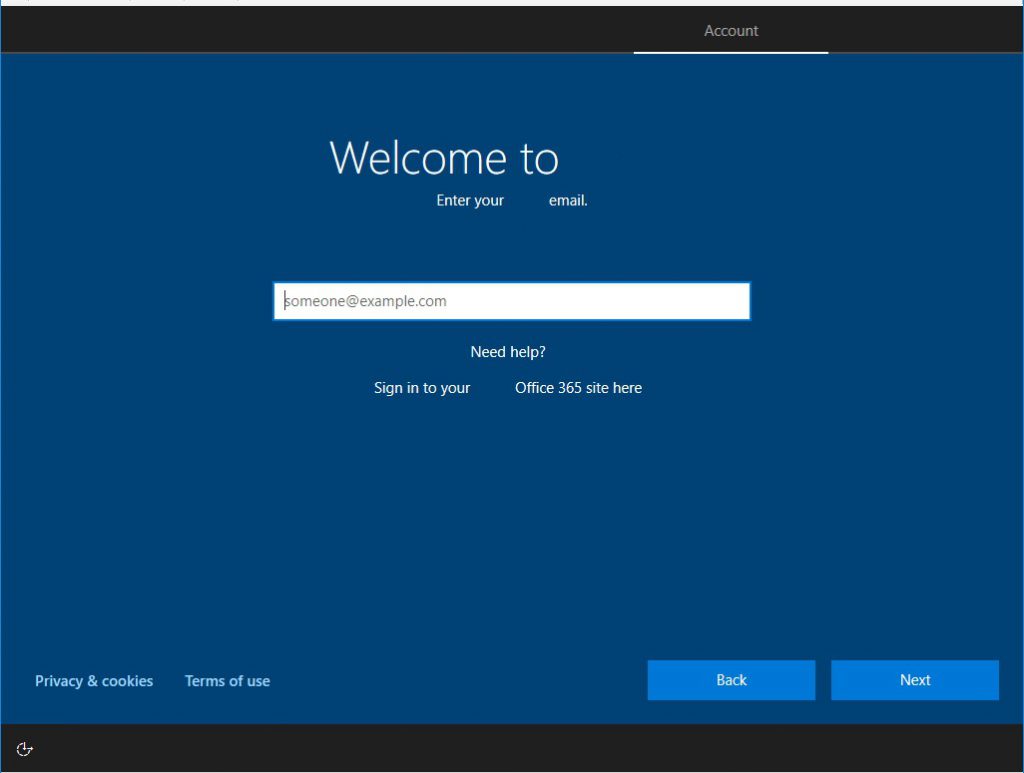
Congrats! Most of the setup is complete at this point, we only have to deploy the new Task Sequence and run it! Back in ConfigMgr deploy your Provisioning TS to “All Unknown Computers” or to a collection if you want to convert already managed machines (there is an easier way to do this that I may blog about later) and PXE boot your device, run the task sequence! After some time (usually 20 min or so) you should be presented with the following screen:
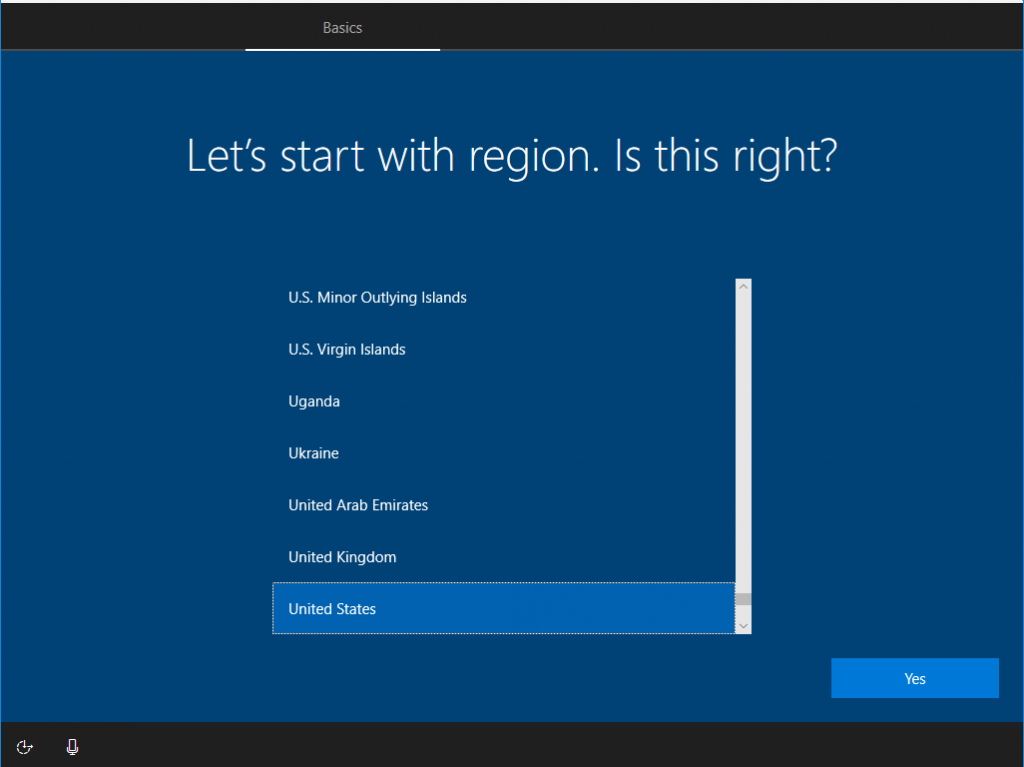
After selecting your defaults, the final screen you should see is your Org login screen.
After another couple of minutes of setup, the provisioning process begins! At this point it will apply any settings that were configured as a part of that Autopilot Profile we set up earlier.
If you check MEMAC at this stage you should see your newly created device but it won’t be named properly yet, and is missing some info.

At this point the machine still isn’t completely converted, that comes a little later, for now, let the device provision and send you to your desktop.
Once we are at the desktop, take a look in MEMAC, TA-DA!

The new device is named according to our AP config file, and is now managed by Intune. If we check the Autopiloted Devices blade we see the following:

Your device is now Autopiloted and managed by Intune! You can now reset this device and it will come up with the settings configured in the AP Config JSON.
Andrew Arsenault Contributor
Andrew is an endpoint engineer based out of Canada bringing some education sector experience to the blog.