In my previous post I’ve shown that we can revert the deprovisioning of Windows 10 apps. This is awesome news for anyone that has removed the Windows Store. I have been unable to find any other way of restoring the Windows Store once it has been deprovisioned, so this is an awesome time saver. Instead of reimaging devices that do not have the store we can simply ‘reprovision’ the store, and perform a feature update! But… who knows the existing impact of deprovisioned apps in their environment? Opinions have changed over time regarding what should be removed (if anything at all!)
Identify sins of the past
Thankfully the power of MEMCM can save us from our mistakes! Custom hardware inventory enables us to gather any information desired into the database. The value of this cannot be overstated. MEMCM is a powerful tool that should be used with care. Because of this we should take action based on DATA whenever possible.
Custom Hardware Inventory Overview
- Write a script to gather the data
Script stores the data in WMI. - Run script on a schedule
Typically with a Configuration Item, but it can be done however you’d like. - Add new WMI class to hardware inventory
This is done on the ‘Default Settings’ - Leverage new inventory for making collections, reports, and decisions
ACT BASED ON DATA!
Step 1 - Write a script to gather the data
‘The data’ is stored in the registry, so we need to extract it from there. From my previous post, we know the data is located at:
"HKEY_LOCAL_MACHINE\SOFTWARE\Microsoft\Windows\CurrentVersion\Appx\AppxAllUserStore\Deprovisioned"
But it is stored as a set of registry keys instead of properties on a registry key. Depending on the structure of data in the registry it may be possible to use RegKeyToMof to generate a MOF file. With this being a set of indeterminate registry keys I’ve decided to use a script instead.
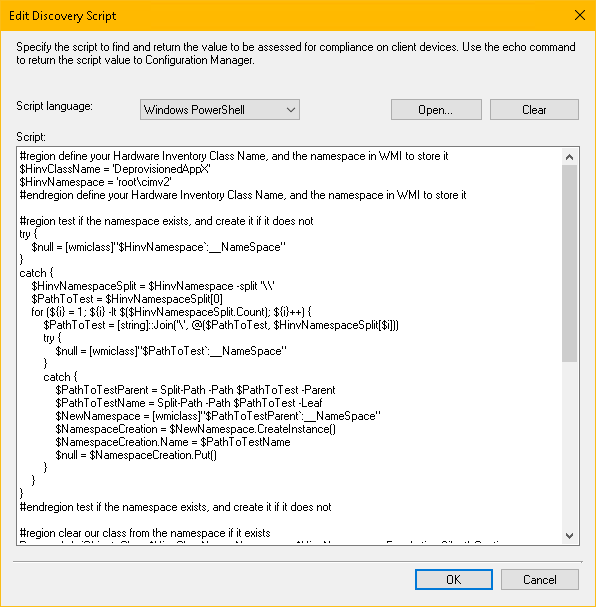
Scripts for custom hardware inventory typically follow this workflow. At least… mine do
- Ensure the WMI Namespace exists
- Clear / Remove the WMI Class if it exists
- (Re)create the WMI Class
- Collect the data
- Populate WMI
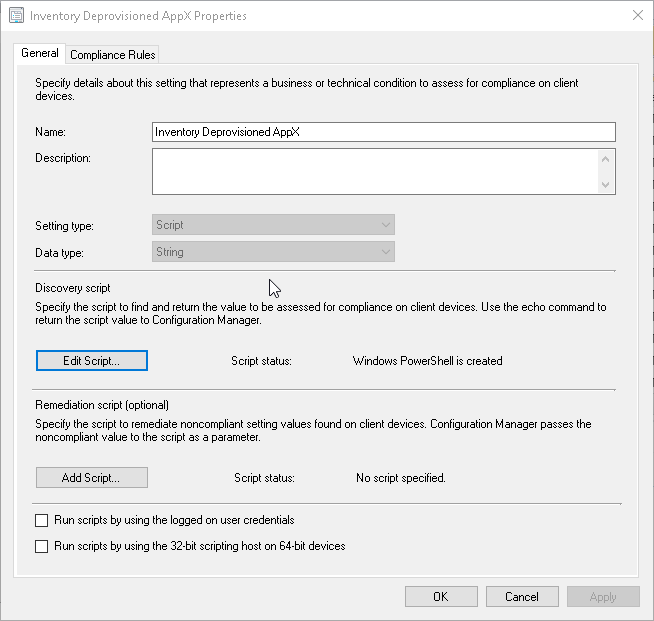
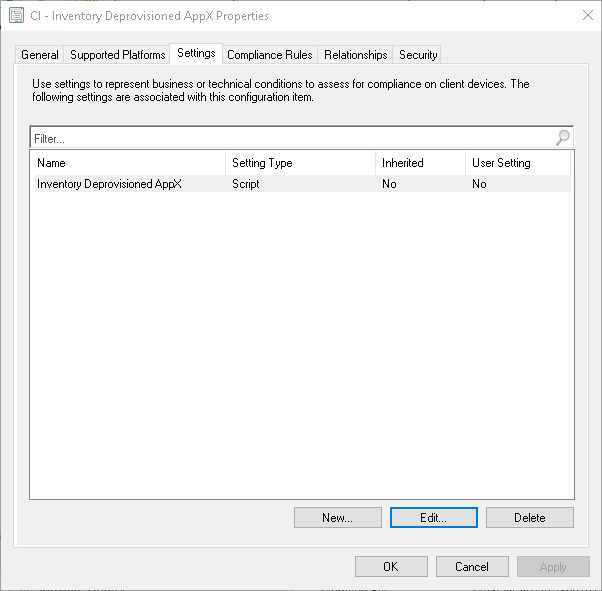
- Write out some random gibberish so that your CI can be ‘Compliant’
| |
Inventory-DeprovisionedAppX
Step 2 - Run script on a schedule
There are countless sources to show you how to create a CI in MEMCM (Don’t search for MEMCM, you won’t get any results. Use SCCM, or ConfigMgr). While a step by step on all those sweet sweet next buttons sounds invigorating, I’m going to provide some screenshots instead.

Some ‘good to knows’ for doing custom hardware inventory in this fashion are below.
- Make sure it returns compliant… Having ’non-compliant’ in your reporting data, or your control panel applet because of a poorly written script is silly!
- Do NOT include a ’timestamp’ as part of your custom inventory unless you absolutely have to. (See this post for an explanation)
- Put some thought to the schedule. Some types of inventory may require a more frequent gather. Compare your need for data with your hardware inventory cycle, as well as the expected rate of change of the data.
Step 3 - Add new WMI class to hardware inventory
The script is written, deployed, and has run on a client. Now it is time to actually get this data into MEMCM!
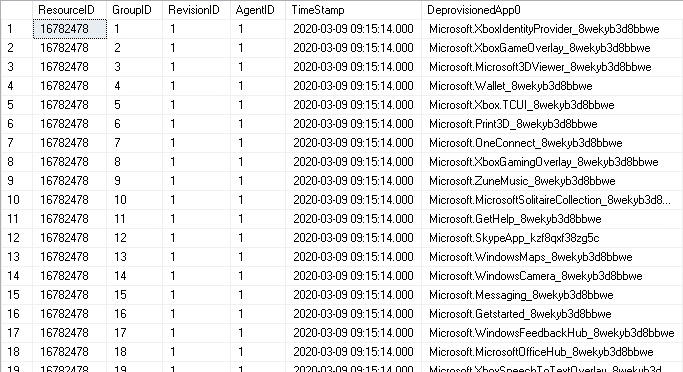
I start at a client that I know has run my script. If everything is working as expected, and I have deprovisioned apps, I should be able to perform a query to return my custom data stored in WMI.

Awesome! That is easily half the battle. Now, to complete the cycle we need to get the data into the database. If you are feeling frisky you can start editing MOF files. Otherwise, you can connect to a computer from the MEMCM console and select the new WMI class. I recommend option #2.
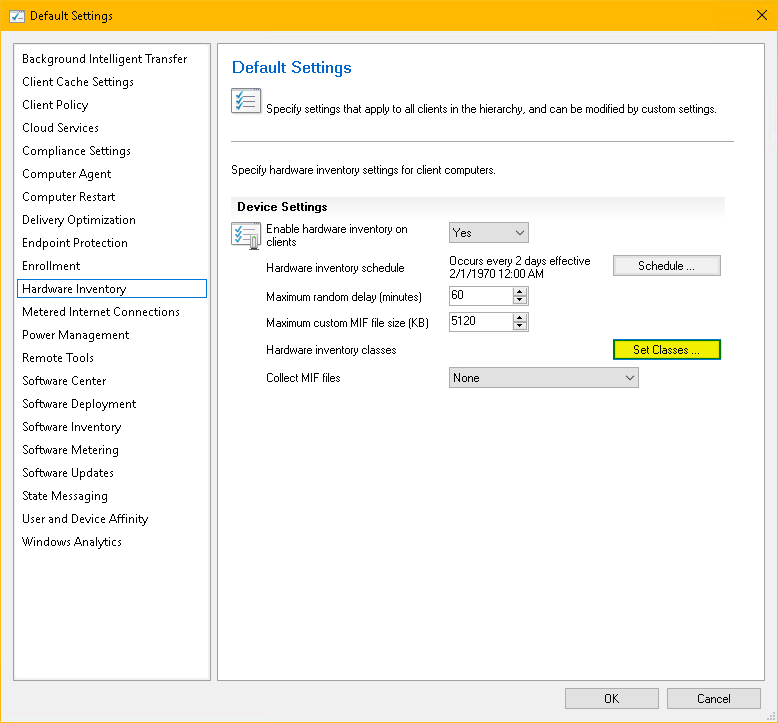
Pop open the ‘Default Settings’ policy, and navigate to the ‘Hardware Inventory’ section. Now click that thingy I have highlighted below (Set Classes…).
And from there:
- Click Add
- Click Connect…
- Type in the Computer name of the device that has the new WMI class
- Specify your WMI namespace if it is NOT the default root\cimv2
- Specify credentials if required
- Click Connect
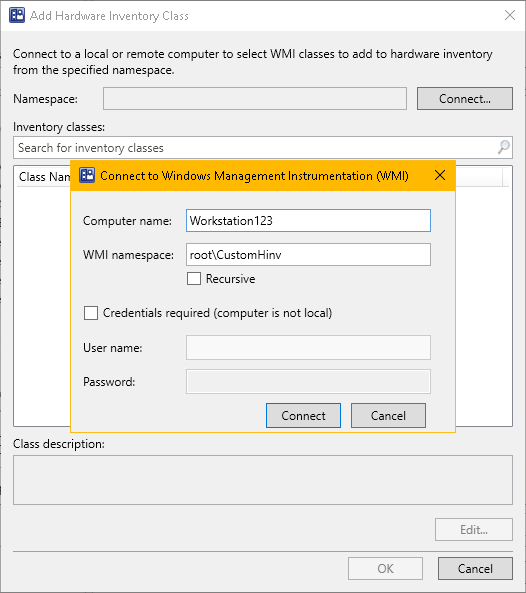
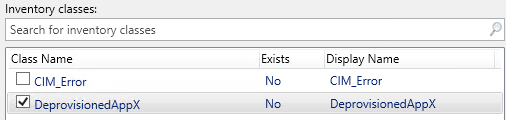
If you didn’t forget your password, a wonderful list of WMI classes under the specified namespace should appear. Check the box, click edit if you feel like poking around, and click ok!
Step 4 - ACT BASED ON DATA!
This bit will have to wait for another post! There is some fun stuff we can do with the data we are now collecting. The next post should spark some ideas for people, I hope. But, let’s still take a look at the data we have now.
In it’s simplest form, we can query the MEMCM database as below.
| |
If we desire a little more insight, the query can be adjusted to show counts.

Join us next time, when decisions, and actions are made with our new found data!
Cody Mathis Contributor

Cody has 10 years of ConfigMgr, PowerShell, and automation experience focusing on streamlining processes